Cox Medallion .051 NFFS Special
|
Here's a few of the things that have been produced in The AeroSmith's shop.
|
|
|
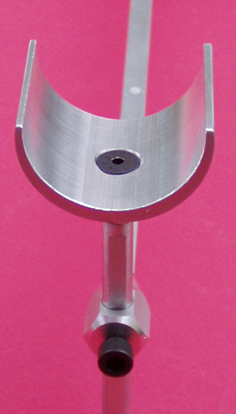
Above: This is part of a 'winding stooge' |
|
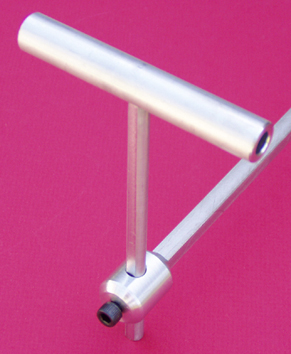
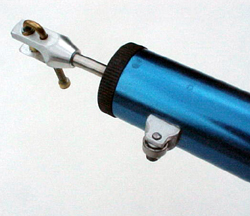
| Right: Prototype for Nostalgia Stooge done for Star*Link This is the first of several prototype stooges produced in The AeroSmith's shop for Star*Link. The production models will be made in the Ukraine. |
 |
 |
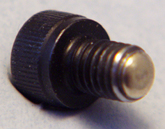
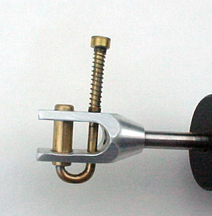
Left: Custom made screw on cradle adjustment. Left: Sometimes stuff is just for fun. Here, the adjustment for height on Bill Booth's cradle is scratch built. It's a simple enough aluminum knurled knob with a brass-tipped screw embedded in it. Just for grins, the center was drilled, and a translucent purple, metalflake plastic insert was pressed in place, then the entire front given the polish treatment. |
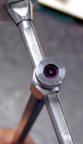
| Right: Custom made, brass-tipped locking screw. Right: Here, a brass insert has been turned, and an Allen head cap screw drilled, and the insert pressed in place. No scratches from this lock-screw. |
 |
 |
Left: Weight ring for inside the nose of F1B rubber model. Left: Here we have one of several weight rings made for flying friend Bill Booth, Jr. Each was anodized to match the model. In use, the ring goes inside nose of the model and clamps to the outer collar that retains a ball-bearing. Lead putty is pressed into the holes to bring the model into the optimum balance for flying conditions. Of course, slapping some clay on the outside of the model works, too.... |
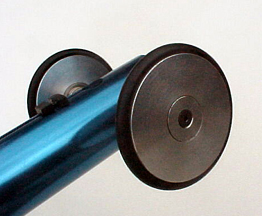
| Right: A bit of 'grip' added here. Right: Thinwall brass tubes used to contain blown, or exploded, rubber motors. They are used to protect the fragile model from damage when a motor being wound does break. In order to make removal of the tubes before flight, using usually greasy, slippery fingers, these knurled aluminum pieces were made and fit into the tubes. |
 |
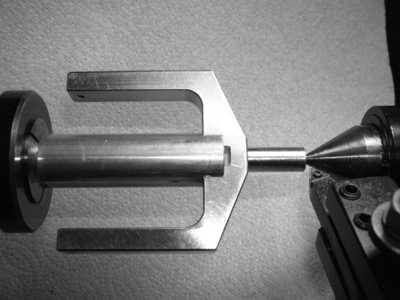 |
Left: Custom fixturing. Left: Here shown a simple custom fixture to allow the stem on this winding stooge yoke to be trimmed to proper size to fit the stainless tube into which it will ultimately be pressed. This from a first batch of yokes produced in the Ukraine; all came just a tad too fat to fit the intended tubing for the stand. |
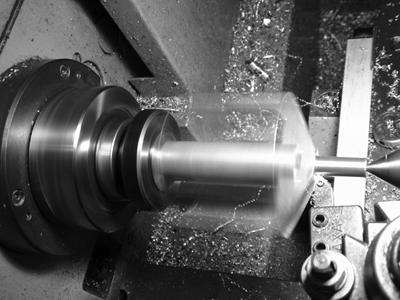
| Right: At speed in the lathe. Right: Here one of the yokes shown above is at speed in the lathe, several thousandths of an inch trimmed from each of the first batch in pretty short order (and of course, some time to make the fixture to allow speedy and accurate work on them). |
 |
 |
Below, Left: The making of the fixture. Left: Making of a fixture. Here, just the basics of what's needed to produce even a simple fixture like that used here. A Hardinge 5C collet (we don't use no junk here!), a carbide slotting saw, and a steel arbor to hold the saw. The lathe and the milling machine both brought into play to make this simple holding fixture. The collet holds the raw barstock in the lathe for cleaning up the face, then for drilling and threading the dimple to index on the part to be held. The same collet is then transferred to a 5C collet closer to hold the part in the mill while the slot is cut. The 'ears' here serve to drive the part being modified (that Ukraine-made yoke) when it is being trimmed to size in the lathe. Even simple looking things can take a large amount of time. Here, the time used to construct the fixture ultimately saved considerable time overall, resulting not only in better parts, but in lower cost to the customer. |
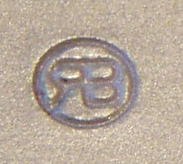
| Right: ID stamp Here, shown much larger than full size (which is a tiny 1/8th inch circle) is The AeroSmith's 'mark', simply initials. They are done is somewhat the branding style of the Old West - the mirror image R aligned with the vertical of the B, and both enclosed in the small circle. You will see this somewhere on most parts that come out of The AeroSmith's shop. |
 |
 |
Left: Rubber tester scale. This is a fine quality Shimano fish scale, here to be used to in testing the rubber used for freeflight rubber powered models. Custom manufactured spring-loaded trap to hook the rubber motors; wheels front and real (here the front "wheel" is a ball bearing in custom made piece to hold it to the tube. |
| Right: The working end. Right: Simple, strong and easy to use hooks to hold the rubber loops for testing. One on the scale, and another on the winch end used to pull-test the rubber motors. |
 |
 |
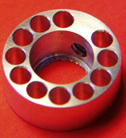
Left: Just for grins... Left: Here's one of those things that was done 'just because'. It was a kick to go overboard here, wheels from scratch, then tires of O-rings, plus the 'hub cap' affair to cover the ball bearings inside the wheel. It was a ball making these.
|
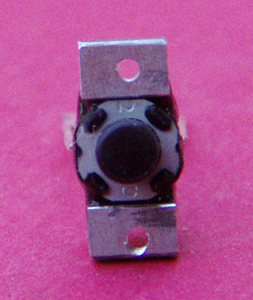
| Right: A better switch for the electronic timers. Right: Here we made up a handful of tiny brackets to hold a better switch for a very popular electronic timer used in the F1B rubber event. This switch has a strong tactile response, and is a bit larger than what comes standard. The small hat shaped bracket is about 3/16" across, and about 3/8 wide. Uses 0-80 button head screws to retain it, with the switch inside the model's pylon structure. |
 |