Cox Medallion .051 NFFS Special
|
Here's a bit about how I go about doing covering and trim. From: Bob Beecroft To: Tandy C. Walker Sent: December 08, 2005 Subject: Polyspan Trim Paint Hi, Tandy: Well, the old Lucky Lindy model has been through a number of iterations, partial re-coverings, huge patches, full recovering, silk and tissue, Airspan and Micafilm at various times. Now it's all Polyspan, and far and away better than silk, and ten times better than Japanese tissue. Originally the entire wing was sprayed with a couple of coats of thin, 50/50 Nitrate, then the LE of the wing was taped off to shoot the color. Again, thin Nitrate with Rit dye to color it red. I'd tell you how that works, but the Rit fades like aniline dye...not so good in my experience. The Airspan colors (was red on the LE of the stab) are virtually fade-proof. Same with Micafilm colors, but neither is as good as Polyspan by a long shot in my experience. Currently, this old model sports all Polyspan, the wing and stab covered TE to LE top and bottom, each in one piece. A couple of coats of clear Nitrate over it all, then tape it off where you want the colors. Taping: The best method I've found so far is to use clear Scotch tape, the old-fashioned shiny kind. I use their "Transparent tape" stock number 557 is the 3/4" wide stuff. I put down newspaper with a nice clean edge cut on it, then put down the Scotch tape with maybe 3/32 or so 'exposed' to adhere to the covering material. Stick it to the paper using a clean glass sheet or mirror. It's tacky enough to keep out any seepage if you rub it down a bit. I've been using Design Master (brand) floral spray. Great stuff. I get mine at Marshall's, an arts and crafts chain. Comes in lots of colors. I've used their #716 Carnation Red quite a bit. A light coat first...don't try for 100% coverage, just an even 'dry' coat first. A second, or third can be added pretty quickly, as it dries to the touch pretty fast. On the second (and third if you want it darker) can go on as a wet coat, not heavy, but just wet enough to get good coverage. It's pretty forgiving, and fade-resistant as anything I've seen. Let it dry a while...maybe an hour at 70°F, then pull the tape. You probably know the drill, but just in case; pull the tape back over itself, pulling it off at about 90° to the direction of travel. If you get any spots that the color leaked through, use a Q-tip and cheap lacquer thinner to wipe it off. Home Depot sells some pretty crappy lacquer thinner - just what you want here, as it's not likely to cut into the dope. (I use DuPont DTL 876 reducer for thinning dope. It's great stuff. See an automotive paint supply store). The floral spray is very easy to smudge once it's down. I let it dry for 24 hours, assuming indoor temperatures. I do trim, lettering and what-not a combination of ways, still. The black striping you see on the attached photo is similar to a felt-tip marker, but it is paint. The good ink-markers I've found are from Zig Memory System, called Opaque Writer. #MS-20 is Black 1mm as a for example. Lots of colors and several widths are available. A craft store will carry them. The stuff Testor's makes I’m not fond of, and wouldn’t recommend it, but a hobby shop may carry it. A straight edge and a steady hand makes great, solid lines. I get a little crazy and lay down ailerons and elevators and trim tabs just for grins. The gold striping you see is TrimKote, cut to strips. It adheres pretty well, but cut the ends a bit long, rub it down good, and a spot of thin CyA at the ends will help keep it down. Oh, and don't try to go across dihedral breaks in one piece. It'll shrink and pull up. I cut it at the joints, and overlap it slightly, then a touch of CyA. The lettering on this one is hand-cut tissue. I've found the stuff from Hallmark stores to work great, and the black is very fade resistant compared to Japanese tissue. Right now (ah-hem, that is when I get to building again...) I'm working on using water-slide decals in place of hand-cut tissue. It's a good computer exercise, and you can do a jillion things with fonts, and most especially with a drawing program like Coreldraw. The decals, using non-tautening Nitrate dope as a carrier, work great. Put them down, let them dry well, then spray another few coats of thin dope, and the edges disappear into the finish. You can go ahead and do any other trim at this point, even vinyl cut lettering if you want, though most likely you'd want to do stick-on lettering after it's finished and fuel proofed otherwise. Not much sticks to the vinyl very well, so better to do it after, I think. Fuel-proofing: The very best stuff is a toss-up between most any of the automotive multi-part (two, and some are three part, plus any reducers, fish-eye preventative, etc.) and the old K&B SuperPoxy. Consider KlassKote the same as SuperPoxy. I know you have it, and the semi-satin catalyst gives the 'right' finish. If I ever run out of either SuperPoxy or DuPont Imron, I'll get KlassKote. Since I have a brand-new gallon can of clear Imron, the catalyst, reducers, fish-eye preventative and more, I doubt if I'll ever run out. Aside from the clear, I have probably a dozen cans of different colors and color metallics, and even opalescent additive for some really trick finishes should I have the notion. I just bought some new paint (new to me, that is). It's from Brownell's, the gun people. It's a single component epoxy finish that is best sprayed onto a (completely clean and glass-beaded) part heated to 90-100°F. After it dries to the touch from the second coat, it gets baked at 300°F for 30 minutes or thereabouts. It is supposed to be so aggressively attached to the base-metal, that gunsmiths use it to add .0004 or so to worn slides and the like. Very expensive. Pints is the largest they sell, so at pint prices, it's $280 a gallon. I've used more expensive paint: Years ago when I was building custom racing bicycles, I bought a pint container's worth of some Titanium (metal-flake) paint. That was about 18 years ago, and it was $800 a gallon then!! Nothing else like it anywhere, though. Anyway, this stuff I'm going to use on an engine or two. Once I get to it, I'll send you photos of my 'secret-weapon' Series 100 Veco when it's done. It will be a real chuckle. Cheers, Bob Beecroft |
|
 |
All Japanese Tissue Trim. This ½A AMA Gas model was done some twenty years ago, before 'discovery' of some of the methods described and used on the latest iteration of the old FAI Lucky Lindy. |
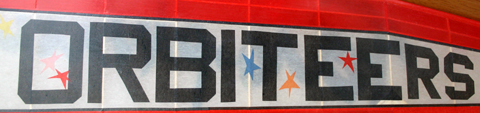
| Double tapered tissue lettering. All done the hard way...layed out on graph paper. Save yourself the trouble and open an unlimited resource using Microsoft Word, or better, one of the fantastic drawing programs like CorelDraw. Let your printer do the layout the modern, easy way. |
 |
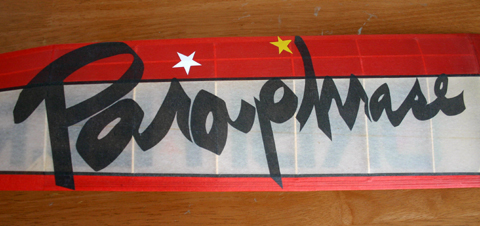 |
Freehand. Something a little different; Here, the lettering layout was done with a broad-tipped felt marker, then the tissue cut out in the old-fashioned way. |
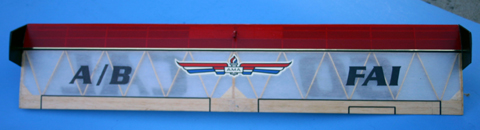
| Center panel of Lucky Lindy rebuild. In all the shots from here down, my very old and trusty Lucky Lindy FAI got the once-over from the steady hand and great eye of best friend, Bill Booth, Jr. |
 |
 |
Left main panel.
|
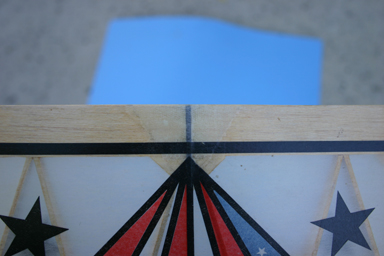
| Close-up of center section reinforcements. Here you can see some evidence of battle scars. The TE has a double layer of crow's foot weave S-glass cloth. The black stripe chord-wise is a band of 6000 strand carbon fiber tow. |
 |
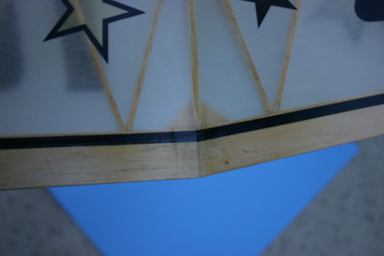 |
Tip TE joint with S-glass.
|
| LE of tip joint. S-glass here, too.
|
 |
|
|
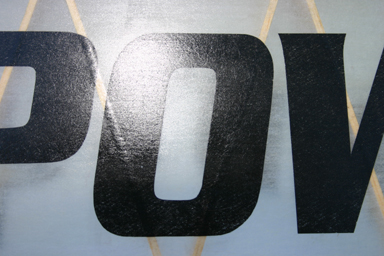
Hallmark tissue letter close-up. The Hallmark tissue is very fade resistant, and is also much more dense. Other colors are more vivid than Japanese tissue as well. The tissue is somewhat more difficult to work with than Japanese tissue, but the effort pays off in long-lasting trim colors. No more grey trim! |
|
Tail fethers and some fun. Every freeflight could use some elevator once in a while, and perhaps just a little trim tab would do. Here just that is drawn onto the covering with one of the ink-markers mentioned in the letter heading this page. |
 |